

Thank you for your purchase of our 2023 brand new vSeeBox V2 Pro/V5 Pro, let's go through the setup procedure:
vSeeBox V2 Pro packages contain:

- vSeeBox v2 Pro – 1 pc
- vSeeBox V2 Pro Bluetooth Remote Control – 1 pc
- Wi-Fi Antenna – 1 pc
- HDMI 2.0 Cable – 1 pc
- Power Adaptor – 1 pc
- User Manual – 1 pc
Basic Setup
- Connect the V2 Pro with the power adaptor;
- Connect the V2 Pro to your TV/Monitor with the HDMI cable provided, or your AV Cable if you need to connect with the AV port;
- Insert the Wi-Fi antenna into back of the V2 Pro;
- Put two AAA batteries into the Bluetooth remote.
(optional): Connect Ethernet Cable for hardwire network connection
Now finish the setup together with the initial-setup wizard program
1. Wait until initializing progress is completed;
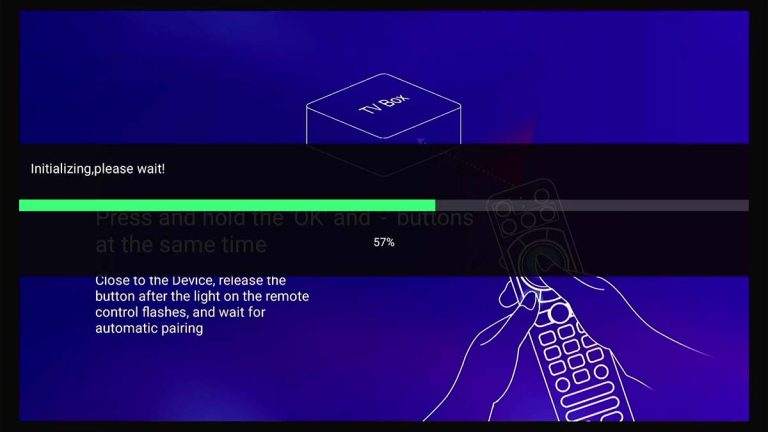
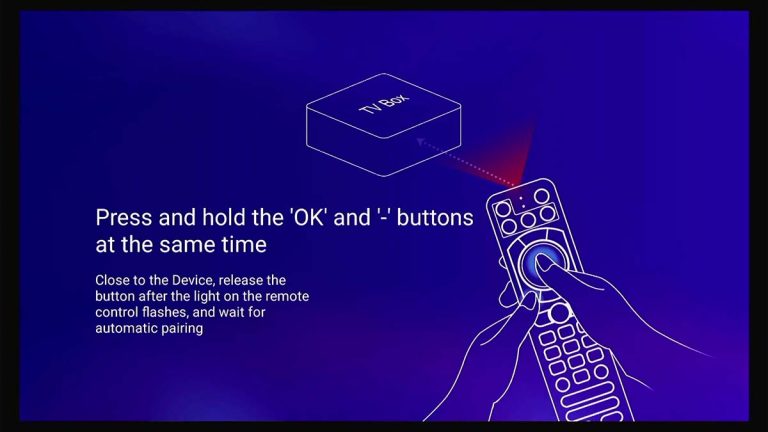
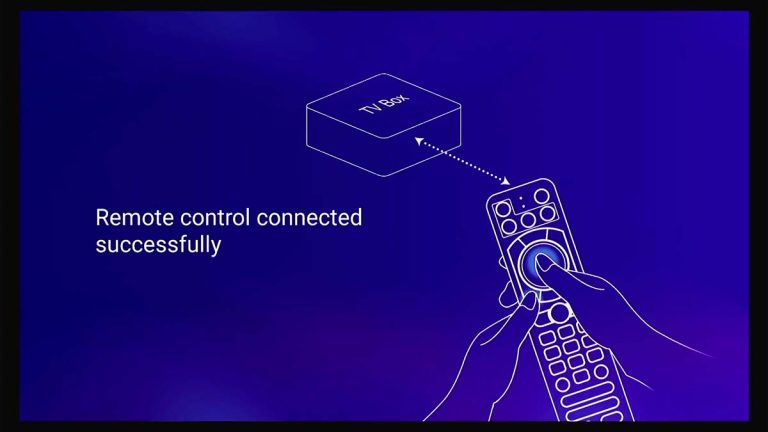
2. Pair the Bluetooth Remote: Hold both [OK] and [VOL-] buttons until the red light flashes on the remote indicator. It shows “Remote control connected successfully” when paired and automatically directs you to the next step;
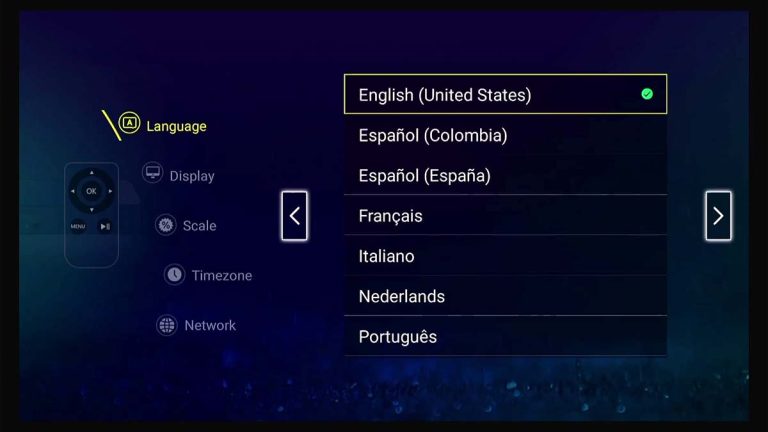
3. Select your Language, then press [Right Arrow] to next;
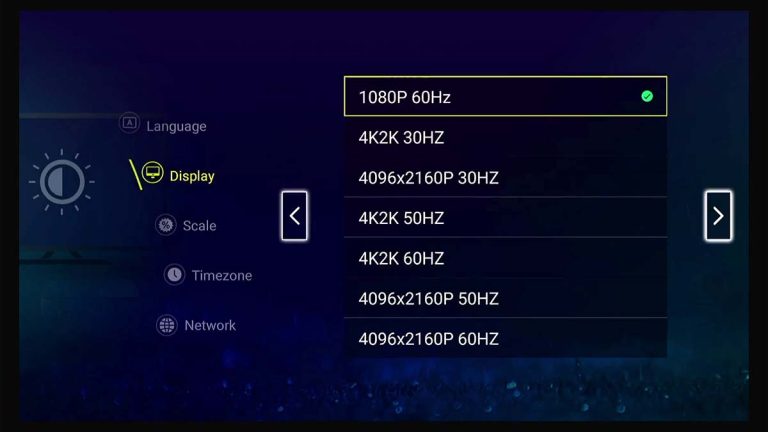
4. Select display options, then press [Right Arrow] to next;
(For HZ option, in general, the higher the refresh rate, the better the watching experience. When images are refreshed faster, the images will appear smoother to your eyes.)
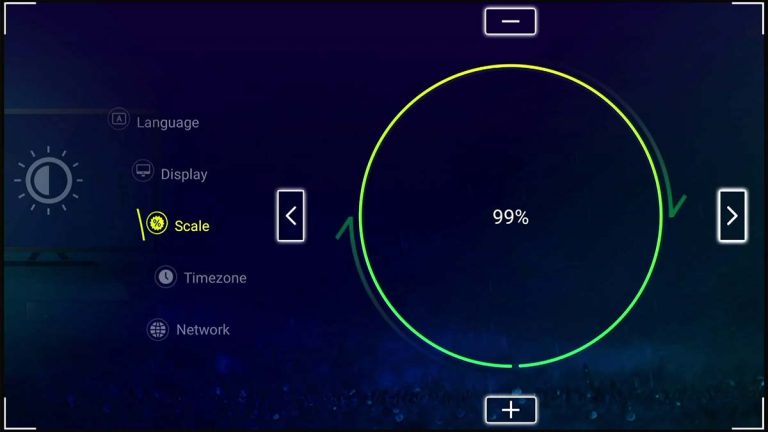
5. Adjust screen ratio, then press [Right Arrow] to next;
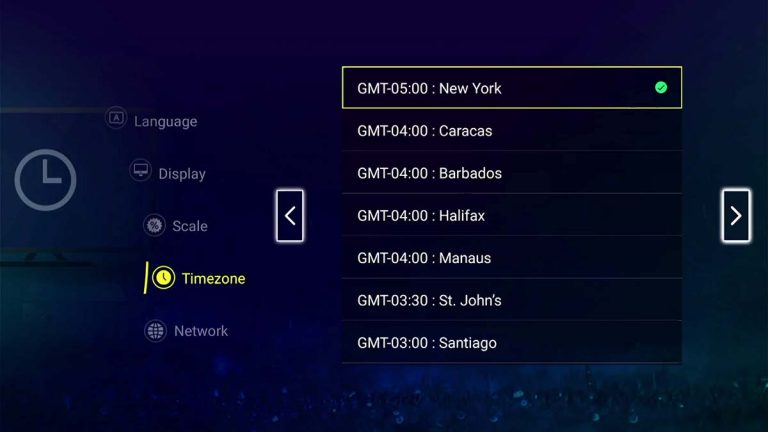
6. Select time zone, then press [Right Arrow] to next;
7. Select network with either Ethernet or Wi-Fi connection
7A: by Ethernet connection:
Connect the box to your router by Ethernet cable and the [x] will disappear on Ethernet option, then press [Right arrow] to finish setup;
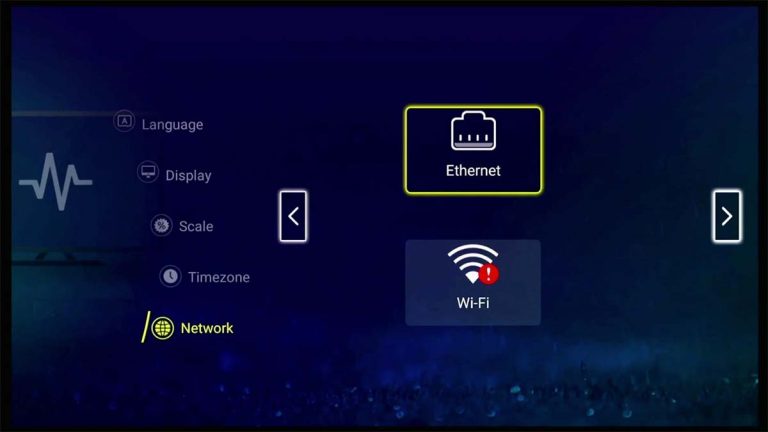
7B: by Wi-Fi connection:
1. Select Wi-Fi option by [OK], then choose your Wi-Fi network, enter password;
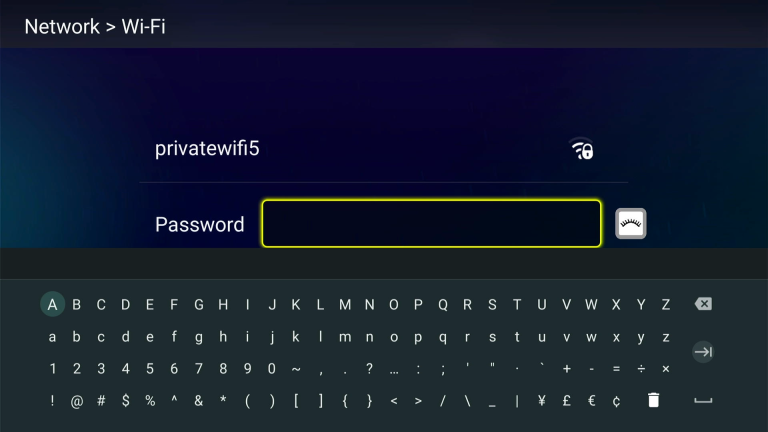
2. It will show connected if password is correct and network connected. If it shows remembered, then your entered password is wrong, please forgot the network and enter again.
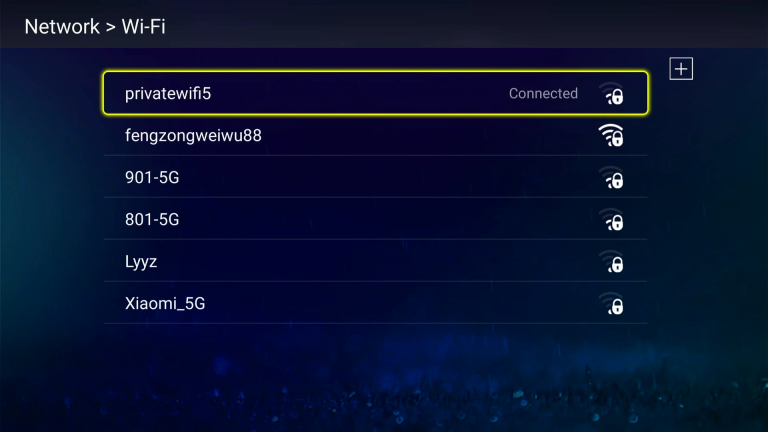
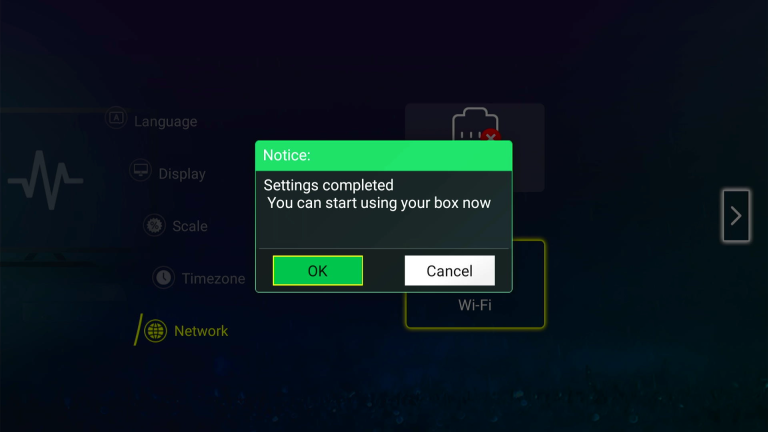
3. press [back] to return to the network setup screen, you will now see the [x] next to Wi-Fi icon disappeared. then press [Right arrow] to finish the setup.
Voice Control Feature
vSeeBox New model V2 pro supports voice control with google assistant compatibility. Today we are going to show you how to fully utilize the V2 Pro voice control feature.
Step 1:
Before using the voice control feature, you can check if your vSeeBox remote is connected to the tv box with Bluetooth. You can check it on the Home Screen settings row, System settings, and Bluetooth. If the remote is connected with Bluetooth, it will show “vSeeBox Remoter” connected in the paired devices section.
If your vSeeBox is not yet paired with Bluetooth, once you hit the “Voice command” button, it will pop out the Pairing screen to guide you in pairing the same. To pair the Bluetooth remote, hold both [OK] and [VOL-] buttons until the red light flashes on the remote indicator. It shows “Remote control connected successfully” when successfully paired and automatically back to the latest screen.
As our voice control feature is google assistant compatible, we suggest logging in to your google account to get the most features out of google assistant.
For any other queries, please contact our online customer support agent or email vseeboxus@gmail.com and we will get back to you as soon as possible.